Makati, Makati, Makati
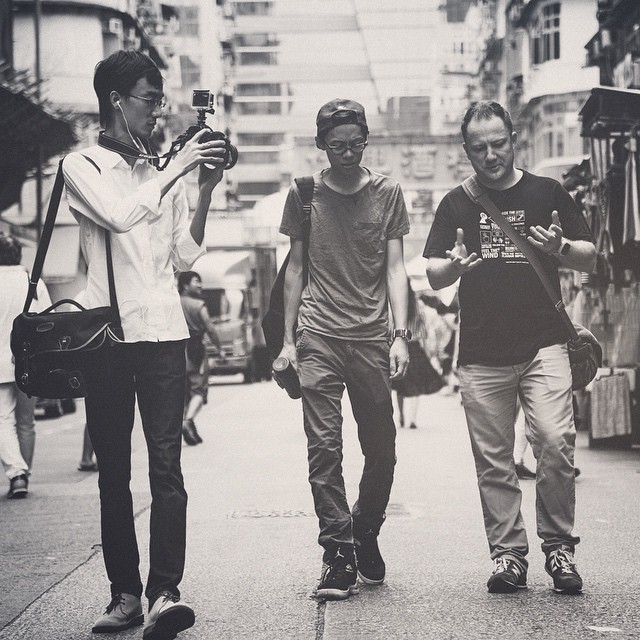
(Kurt Kamka on the prowl on the back streets of Makati, OMD - 25mm)

Some will know Makati as the business district of Manila in the Phillipines....some may know it for another reason - an infamous red light district.....you will find neither of those places featured in this blog post.

Today's post is about two guys just going for a walk down a few streets of Makati, well away from the business zone and suits and well away from the red lights.  I see both those things in Hong Kong on a day to day basis whilst moving around town and I have no desire to feature either of them here, so I wanted to simply show a few images from taking a walk down some completely normal streets just off the tourist map in Makati with my new shooting buddy Kurt Kamka.

I was lucky enough to hook up with Kurt Kamka on this trip who was my trusty guide throughout my few days shooting.  He does some outstanding photography on the streets of Manila and his work can be see at the following links:

1.  Kurt Kamka Blog

2.  Kurt Kamka Tumbr site

Something I have mentioned a few times before and will continue to do so is about using the Olympus OMD camera for this type of photography - in my mind its perfect....simple as that.....both me and Kurt shoot in a similar fashion with this camera, fully utilising the rear tiltable screen as a viewfinder and one touch  shutter release of the screen...it works wonders.  Ironically both of us previously shot with Leica M series cameras but are both finding the Olympus to be well up to the job on the streets (Kurt also still shoots with a Leica S2 camera).

(Brothers, OMD - 75mm)

We had earlier been shooting some people that live at the Catholic Cemetery in Manila (blog post on that featured here) then grabbed some water and headed for another hours walk round some back streets.  These are the images that we captured on that walk.  I am still mesmerised by the colours of the Phillipines, I actually find it hard to shoot in black and white here, as everything has a beautiful 1970s pastel colour tone to it (in my mind at least), which I just want to record all the time with my camera.  Even this little girls blue Ukalele seen below was exactly that, from the clothes to the Jeepneys, the colours just scream out at me.

(Perhaps the warmest smile of the day - OMD - 75mm)

We came across these kids sat in the street playing musical instruments and having a great time together, I stopped to take some photos, help them practice a little bit of English and then scare them with my terrible Ukalele skills...lol.

(Image by Kurt Kamka - The kids weren't familiar with my Beatles and Rolling Stones renditions...lol)

I have never seen so many smiling kids as I have seen here during this trip, a lot of people call Thailand 'The land of smiles'....I'm quite sure the Phillipines could easily win this title also.

(Land of smiles, OMD - 75mm)

There were also plenty of animals to be found along these back streets, I saw a lot of cockerels tied to doorways, and Kurt explained to me that these were used for 'cockfighting', a viscious sport I imagine which seems to be very popular here and in many other parts of Asia.  I also encountered a vicious dog or two, luckily tied to a post, and probably the skinniest cat I have ever seen!

(Who let the dogs out?, OMD, 25mm)

('Ma-Cat-i' in Makati, OMD - 25mm)

As well as the young kids in the street we met plenty of elder folk who were equally as nice and pleased to meet and interact with us as we wandered through their neighbourhood.  Of course we had a few funny looks at first, but with big smiles and friendly gestures, every single person we met was more than happy to be photographed.

(Friendly gentlemen in Makati, OMD - 75mm)

On our way out of the back streets we came across a building site, where some workers were hanging around outside on a break, they stopped us in our tracks and insisted that we photograph them.  The Fillipinos just seem to LOVE being photographed at every opportunity.

(Pinoy smiling builders, OMD - 75mm)

As we finished our walk the heavens opened and poured down, so it was time to jump in a cab and head back for a coffee and some editing.  A succesful day was had by both of us and a great first meeting.  On the way back to my hotel I was reminded of the poverty that of course exists here as beggars tapped on the taxi window asking for money, I am never sure what is best in this situation, does giving them money keep them on the streets...i guess so...but its always a hard call for me...

(Begging at the roadside - OMD - 12mm)

The following day I found a photography paradise in a part of town called 'Pembo'.  I am currently editing my images from that location and will do my next blog post on that once I arrive back to Hong Kong tomorrow afternoon.  Please be sure to come back for a look as there are some great characters featured in those images and if anyone reading this has any desire to photograph life in the phillipines, I strongly recommend visiting that place.

All images here are shot on the Olympus OMD with various prime lenses and all processed with 1-click presets fromVSCO film presets, still by far my favourite film simulation filters that work directly as a preset within Lightroom 4.

For other posts I have written recently with images of the new Olympus OMD in Manila please see the links below:

LINK TO BLOG POST: Residents of Makati Catholic Cemetery

LINK TO BLOG POST: OMD goes to Manila (first trip in July 2012)

LINK TO BLOG POST: OMD shooting in Ulingan, Tondo, Manila

Thanks for taking the time to visit our blog, if you like our blog and website, please ‘like’ us on our public Facebook page and share this story with your friends with the Facebook and twitter links below.  You can also subscribe to our blog via the RSS link below.

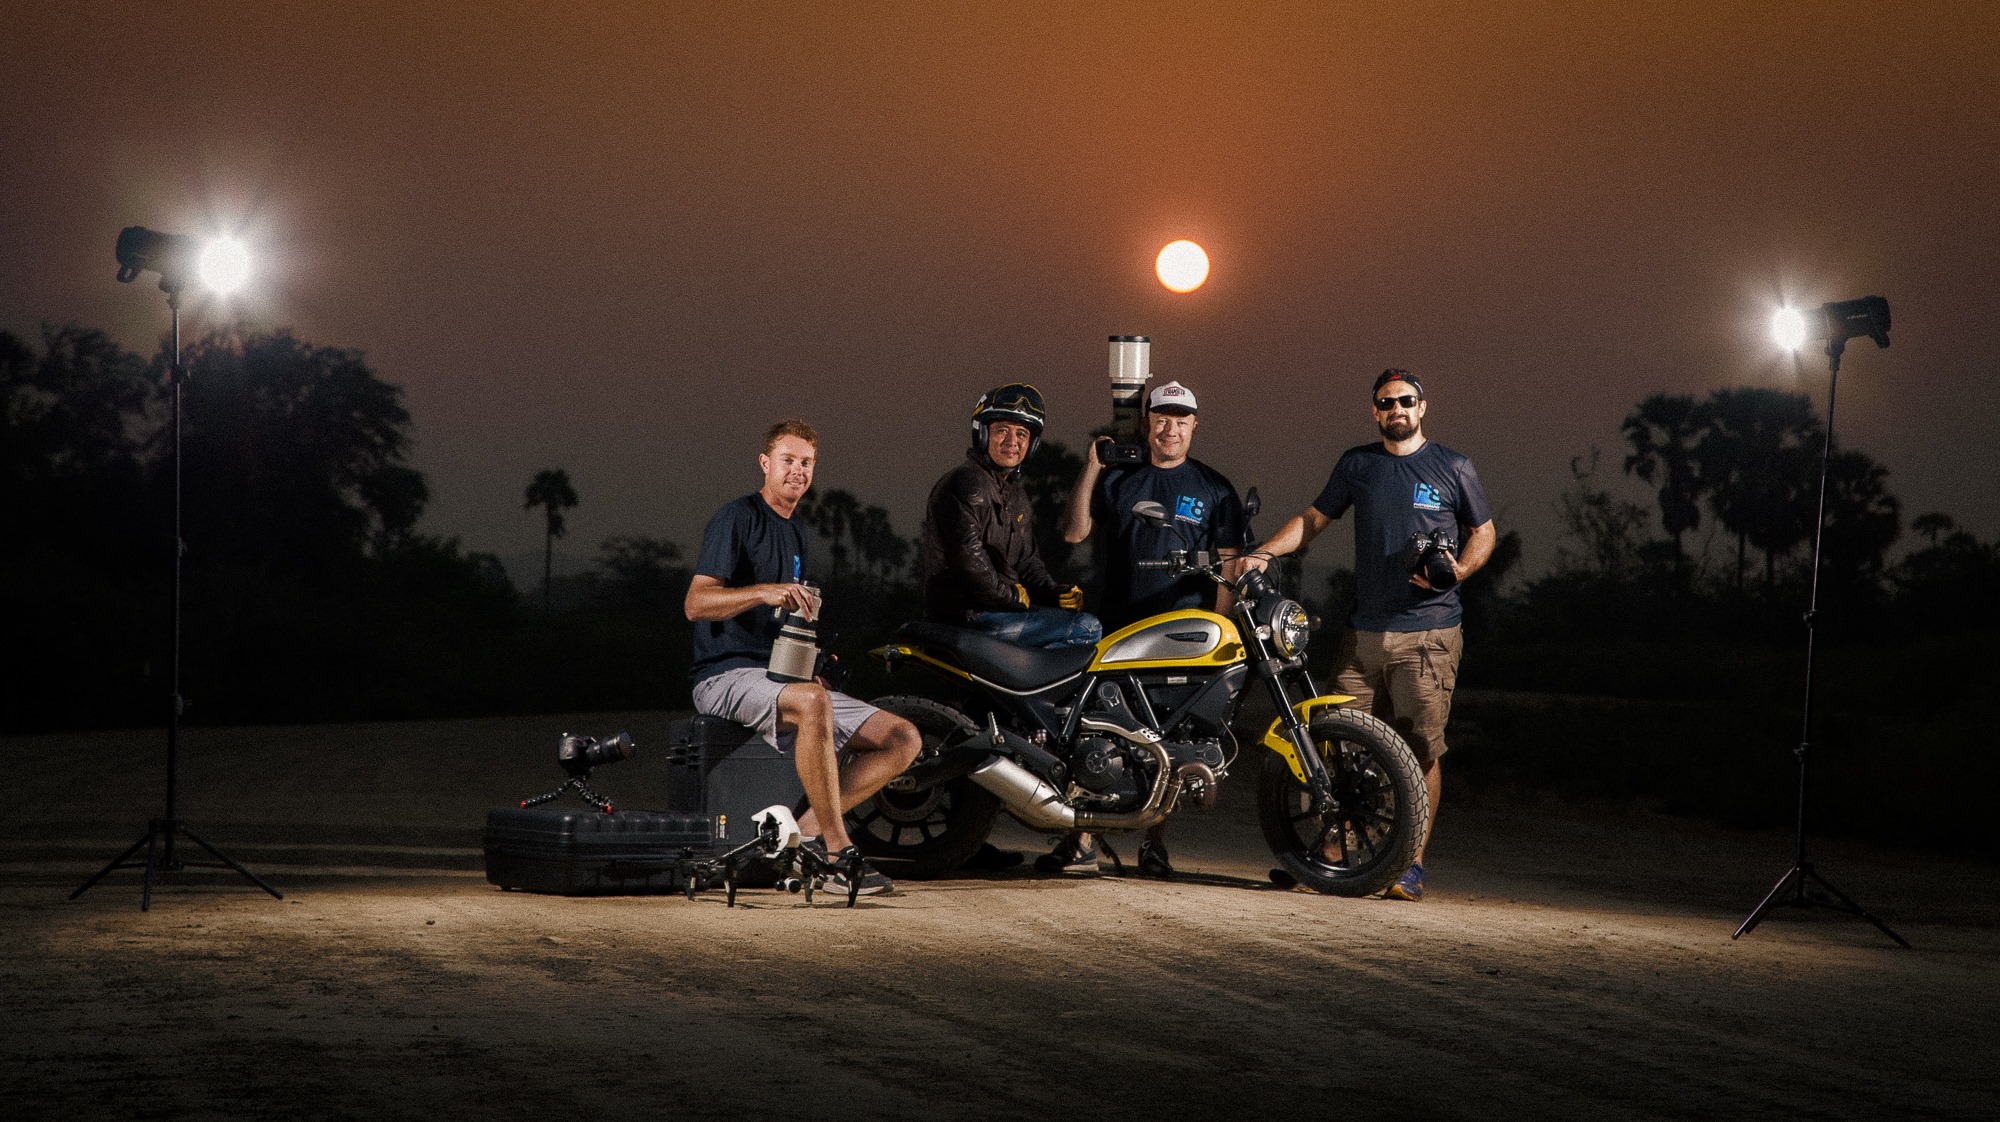
F8 Photography provides commercial photography and photography and video training workshops, more details can be found via the ‘courses and workshops’ link and upcoming events via the front page of our website.


OMD goes to Manila

(street scene in Manila) NOTE ABOUT PROCESSING:  All images here are shot on the Olympus OMD with various prime lenses.  They were then all processed in Lightroom 4 with 1 click presets from 'VSCO film 02' using only their Fuji Superia 800 for colour or Fuji Neopan 1600 settings for black and white.  These are my favourite film simulators and make any digital camera RAW files sing instantly with 1 click.  More information can be found here at the VSCO website on these presets.

So, after a successful trip to Cambodia using the Olympus OMD  the previous week, I decided another trip was in order, this time the other direction from Hong Kong, heading South East to test the EM-5 on the streets of Manila in the Phillipines.

Now some things must be mentioned about Manila for any budding photographers wishing to travel there.....BE CAREFUL.  As much as I liked the city, for sure there is a lot of things that could easily go wrong here....some of the poorer parts of the city are for sure totally unsafe for westerners to venture into alone, and carrying expensive camera gear around is only going to attract unwanted attention.  Like many other places I have visited you must stay streetwise, don't flash expensive gear, leave your nice watch at home and most of all use common sense.  Walking around at 2am in a poor neighbourhood in Manila is going to end in tears for sure....

(Traffic wardens in Manila....ummm whats the point...)

The first thing I noticed when walking around various parts of Manila was the traffic.....it seemed there was complete chaos on the roads, not dissimilar to Hong Kong at rush hour, only here it seemed to be the same all day long....so i chose the best options of transport, my own two feet :-)

When I did travel between districts I used the famous 'Jeepney' buses that can be found everywhere, they are great fun to drive around in, extremely cheap and provide good photo opportunities from the back door, open windows and even of the people inside.

The first day I was in Manila I was lucky with the weather, the light was great, it was hot, just a nice afternoon for strolling around exploring the city.  Lunchtime is clearly siesta time in Manila with people strewn all over the place getting an afternoon nap, kind of reminded me of my parents place in Spain where the same thing happens every day.

(siesta time in Manila, its sleep, read or relax...)

The few people that weren't asleep were having an easy time playing board games in the street.  This kind of place was helping me relax a lot even after a few hours, as I always compare with Hong Kong, which seems to be really non-stop (part of the reason I love to escape as often as I can), you really don't see this kind of lifestyle in Hong Kong, despite the heat, people are running around at full pace 24/7, at least in the inner city where I work and live, so its really nice to see people taking time out and 'smiling'!!!

(A lovely lady who was more than happy to pose for photographs in the street)

Like most asian cities, the streets were full of children playing and kids always make great subjects for me, they are innocent yet their faces tell a thousand stories, something i noticed recently when shooting a scene in Hong Kong was that everyone in the scene was just going about their business apart from 3 kids in the scence, all of them were looking directly at me....maybe kids would make the best street photographers...as they are very very aware of their surroundings and dont miss a trick :-)

(happy kids (and dogs) playing in the street in Manila)

Of course some people view photographers a little more suspiciously, but despite that, a big smile and a handshake go a long way, and as usual, everyone I met and befriended were absolutely fine being photographed.  Even the gangster looking dudes who try to look 'tough' guy tend to break a big smile when I show them their photo and tell them they look like 'James Bond'....flattery gets you everwhere...

(locals in Binondo district, Manila)

The variety of people and colour around the city really attracted me, it really is a bustling metropolis and a great photography location.  As I mentioned earlier discretion is the better method with camera gear (as is pretty much anywhere in my experience), so using the little Olympus OMD was actually perfect (yet again), as it allowed me to shoot discreetly from the hip using the touchscreen with its super fast autofocus.  This is the 2nd time I have used it travelling in a month, and it didn't skip a beat at all, ultra reliable....I thought I would miss my Leica M9...but if I'm honest, this thing is far more functional, never ever stutters like the Leicas do (thats a simple fact that sometimes the M9 just won't react when you press the button...) and the image quality is amazing, of course not superior to a full frame camera...but most of our work is going on the internet or medium sized prints, I am quite positive to 99% of people, there is no visible difference in image quality, and those that think they can tell a difference on a processed image (especially at web size images)....well their name is Pinnochio I'm afraid....

(diverse characters around town, security, driver, and the oldest paperboy!)

A quick note again on the presets that I have used to process these images, they are from VSCO, and are the simplest and most powerful presets you can get in my opinion for Lightroom, ACR or Aperture.  They really do emulate the film looks well....how do i know this....because I shoot a fair bit of these exact films on my Mamiya 7ii and my Contax G2 and scanned files have very similar tones and characteristics to these digital files once processed.....so if you are looking for a filmic simulator that takes seconds to process your RAW files, these are worth a look for sure.

(Processed with VSCO Fuji Neopan 1600 or Fuji Superior 800 settings)

Whilst I was in Manila, I did some shooting in a very poor area called Ulingan in Tondo, probably the roughest and most dangerous area of Manila, the reason being I want to work with a charity there called Project Pearls, and I will be heading back to Manila now that they have made contact in a few weeks to do some video work with them.  You can see the blog post and video of the images shot there last time at this link, its really quite amazing to see the resilience of these people who live and work there.

For other posts I have written recently with images of the OMD please see the links below:

LINK TO BLOG POST: OMD shooting in Ulingan, Tondo, Manila

LINK TO BLOG POST: OMD goes to Cosplay event in Hong Kong

LINK TO BLOG POST: OMD goes to Cambodia

Thanks for taking the time to visit our blog, if you like our blog and website, please ‘like’ us on our public Facebook page and share this story with your friends with the Facebook and twitter links below.  You can also subscribe to our blog via the RSS link below.

F8 Photography provides commercial photography and training across Asia, with workshops on Street Photography and other photography and video training courses, more details can be found via the ‘courses and workshops’ link and upcoming events via the front page of our website.


Me and my Mamiya 7ii

(50mm,(25mm equiv) - I turned to see this girl who was watching what I was doing)

On my crusade to find the perfect medium format camera over recent months, I think I may just have found the holy grail - The Mamiya 7ii.

Until recently, I had only been shooting film on the Leica M6 and a Rolleiflex for medium format.  Now I REALLY love my Rollei, don't get me wrong, but sometimes I struggle with the square format, I just find it difficult to 'see' in 6x6 format, therefore the search started for something a little more traditional format, but as usual I wanted a super lightweight camera (like the M6) that could deliver outstanding image quality...

As I am no expert on film cameras as have been purely digital for many years, I was unaware of all the options available, then I started to learn about the Mamiya 7ii, a rangefinder....lightweight, with 6x7 format....hmmmm....this sounds too good to be true, so I started doing some more research, and it seems this camera is very highly regarded amongst those that use it.

The winner factor for me is size...its half the weight of a hasselblad, but has a bigger negative (6x7 as opposed to 6x6), and for me a more useable format.  The lenses are second to none in optical quality, they make my Leica lenses all look soft in comparison.  Granted, they are only F4 lenses, but this is not an issue with such a big negative size, and you cannot compare an F4 lens for this format to a 35mm format, as depth of field is not comparable.  In effect, your focal lengths of each lens are halved, i.e. an 80mm lens is approx a 40mm lens in 35mm format, therefore an F4 lens can give you a depth of field not too disimilar to F2 (hope this makes sense...)....This is one of the reasons they don't need to make faster lenses, if you had an F1.4 lens on this format, depth of field would be so slight that you would struggle to ever get anything in focus.

The lenses I use on this system are 50mm (25mm equivalent), 80mm (standard lens, 40mm equivalent) and 150mm (75mm equivalent), which I think covers all bases, wide angle and architecture, standard lens and 3/4 portrait/headshot lens.  All of this kit fits easily into a small 'Think Tank Retrospective 5' shoulder bag (the same bag I carry a 4/3 system in), and I am quite sure there is no other interchangeable medium format kit on the planet that can take up so little room and produce such big results.

Also worth noting are that the lenses use leaf shutters, which means near silent operation, and minimal vibration when shooting, hence handheld shots at lower shutter speeds are much more useable than with a DSLR rig.

(My friend Bernhard shooting inside Man Mo Temple - 7ii light meter coped easily with this scene)

I have read on some other blogs whilst researching that the Mamiya 7ii light meter is not the best, and not always accurate.  I can only speak from my own experience and that is the light meter has been spot on for me every time I used it.  I went and bought a separate light meter as I expected to get inconsistent results, however, after shooting a few films in different lighting, I can say that the meter is as good as any camera meter I have used before on any other system and gives me no reason to use an external meter in any situation I have been in thus far.

I shoot a lot on digital as I said before, and I spend a fair bit of time tweaking images with black and white conversions to get just the right look for that particular image in Lightroom 4 and Silver Efex Pro 2.  Thats fine and thats all very necessary with digital RAW files, however, something I love about using different films is they all have a very different aesthetic to them, and all the images you see here on this blog post are unprocessed, just scanned in on my Epson V700 using Vuescan software.  So these are as they appear on the negatives, which is what gets me excited, I strive to get similar looks to this with digital, and the truth is it just isn't posible to replicate it exactly.  For one, the dynamic range of film is far superior, keeping highlight details on film is simple compared to digital, which allows for far greater range in lighting in scenes, something i had forgotten about until my return to film, I really hadn't taken much notice of how much I was losing with digital images.  On a recent trip to Cambodia, a friend of mine shot a very similar image to the one below, he was using 5DIII, and the highlights on the metal roof were blown away if he exposed for the man.....the difference was quite apparent how much more dynamic range the film could handle in this light.

(Highlights were retained on the reflective roof)

(Another example of how highlight and shadow details are easily retained, and how sharp the 50mm lens is...)

I think there is room in all our camera arsenals to shoot both digital and film, digital will always be my standard method these days, for sure, but I like the way film images look, the different characteristics of each film, and perhaps the most important thing for me is the way I actually shoot when I use film....it slows me down, right down.  With 120 film on the Mamiya you only get 10 frames per roll....thats not a lot....so you cannot shoot the same way as digital, you have to think much more about each frame, slowing yourself down, and that is always a good thing in my mind.  The other thing I love about shooting this is after I go home or back to the hotel if abroad, I put the camera and films away and relax....I don't then sit down in front of a laptop and start phase 2 of several hours of picking, rejecting, editing, uploading......it isnt possible until the films are developed and scanned....so I get some of my own personal time back too....its a win win situation.

(I shoot much slower with the Mamiya....thats a good thing....slowing myself down :-)

I have re-learned to develop my own film at home in the kitchen, which again adds an element of fun to the whole process...I probably trashed 25% of the first films i shot as I had some 'issues' loading films in a change bag, but this all adds to the experience, and just gives a very different feeling to the final images.

I had some prints made a few weeks back from the 6x7 negatives, and the results are nothing short of spectacular, the resolution, detail and sharpness I can see in these images cannot be compared to any digital 35mm system, its far superior in many ways.  Now I haven't used medium format digital so I can't speak for that, but one thing I know for sure is the cost alone of getting into medium format digital is no joke, and out of reach for many (myself included).

Here are some more samples from this amazing camera system, all scanned on the Epson V700 with no other corrections.

I have recently discovered the Contax G2 also.....another amazing little camera, this could be the 35mm rival to the Mamiya in terms of quality.  My thoughts are that if you are a photographer currently shooting digital and what to broaden your horizons, then take a serious look at a small film camera.  You will approach your shooting in a different way, which can only enhance your experience.

Happy shooting!

(Fuji colour slide...love it)

(Behind the scenes on recent Cambodia expedition)

(Very slow shutter speed in low light - no problem for leaf shutters)

(The 50mm lens - 25 equivalent, perfect for interiors or close up wide shots)

(The 150mm lens - 75mm equivalent, ideal portrait lens on the Mamiya 7ii)

(Temple complex close to Phnom Penh - Cambodia)

(The Mamiya 7ii - the perfect rangefinder camera?)

Thanks for taking the time to visit our blog, if you like our blog and website, please ‘like’ us on our public Facebook page and share this story with your friends with the Facebook and twitter links below.  You can also subscribe to our blog via the RSS link below.

F8 Photography provides commercial photography and training across Asia, with workshops on Street Photography and other photography and video training courses, more details can be found via the ‘courses and workshops’ link and upcoming events via the front page of our website.

Guest post: Down under in Phnom Penh (Dave)

Note:  This post is written and all photos by Dave Grady who came from Australia for one of our Hong Kong workshops then travelled to Cambodia with us.  Dave shoots with a combination of Leica M9P, Sony NEX 7, Nikon V1 and Canon 5D Mk III rigs.  This is his story.

(Boat boy crossing the Mekong)

In July 2012 I was fortunate enough to attend F8 Photography's documentary photography workshop in Hong Kong.  Just prior to attending the workshop I was also invited to go along with Gary, Giles & Steve to Cambodia directly after the workshop to practice some new found skills, an offer I couldn't refuse.

After attending the documentary workshop which broadened my mind and the way one can approach photography (picking a theme and shooting a series of shots rather than just looking for  one shot), and then spending my last day in Hong Kong with Gary while he shot editorial work on a 1 million dollar yacht, I barely had time to pack and we made our way to Phnom Penh on the early morning flight direct from Hong Kong equipped with an Leica M9, Sony Nex 7 and  Nikon V1.

Having just been to remote areas of mainland China, some of the scenes I'm seeing are familiar but in general it's very different to what I'm used to seeing in Sydney.  The traffic is chaotic yet flowing at the same time, People walking all over the place carrying who knows what, families cramping up on one scooter (up to 6 people on 1 small scooter) and the little shops on the side of the road and the mobile street vendors all made for a very interesting drive to our hotel. It was evident very early in Phnom Penh that Cambodia is not a wealthy country but was amazed at how friendly and happy people were.

We arrived at our hotel that Gary had organised for us which was really nice, we dropped off our gear and jumped on a tuk tuk (my first tuk tuk experience) and made our way to the riverside bistro which became our regular watering hole for the rest of the trip, after a brief nap and swim at the hotel pool (which was great for mid/late afternoons after shooting all day) we made our way out for a walk along the riverside were we came across what i'm guessing is a daily ritual where people go to a small temple to pray with people around selling flowers, candles and birds which I believe are offerings to the Gods. This event made for good photography with lots of people around to shoot and lot's of stuff happening everywhere.   This was my first real chance to shoot in Cambodia and was really surprised and taken back by peoples willingness to have there photo's taken especially with kids which is a big no no in many western countries.

(Nikon V1, 10mm)

The next morning we met up with Gary's translator and our tour guide/tuk tuk driver Sammy (Samedy) and off we went to Mekong Island, after a short ferry ride across the Mekong river we arrived and stopped at a small shop to get supplies for the day and pick up a few Krama's (traditional Cambodian scarves).

(Dave modelling his new Camodian scarf on route to Mekong Island)

Mekong Island is a small remote area across the river from Phnom Penh, it's not an area tourists would normally visit and the same goes for Phnom Penh locals many hadn't even heard of the place let alone been there.  What I saw of Mekong Island consisted of 1 small dirt road with houses on 1 side and the Mekong river on the other, It was however full of photo opportunities.

(Leica M9P)

We met lot's of nice people alongside the road who were more than willing to have there picture taken, A little girl who waved at us even motioned for us to go into her families yard where we spoke to her mother and took photo's of them both. The one person who will stay with me for a long time was a blind man in a small shack who allowed us to take pictures of him, after which Steve got out a $20 note (usually we would give a $1 or $2) and gave it to him, after finding out the value through Sammy who translated for us just seeing his reaction was truly priceless he was so gracious and had many nice things to say.

(Blind villager)

(At the female monastery)

(Dave (right) and others from the team offering rice to the Nuns on our arrival)

Moving on we then arrived at a Women's monastery which was in the middle of nowhere and you would never know it was there unless you were with someone who knew about it. This place was very peaceful and had some amazing statues all throughout the monastery. We spent around an hour just wondering around just taking everything in and taking photos of the many statues and Monks who were more than happy to have there photo's taken. After we had all finished walking around it was mid afternoon and we were all hot and hungry so back we went to the hotel for a swim and lunch.

The next day we had a few different options but we decided on going to a temple complex about 45 minutes from Phnom Penh, It was quite a long ride on the tuk tuk and when we finally arrived.  As we walked around and looked at the temple you could easily be mistaken and think you were in Angkor Wat.

(Temple complex outside Phnom Penh)

This place made for some great landscape, texture and portrait shots, 1 old lady we found between the 4 of us we must have shot 3-4 rolls of film and a couple hundred digital shots, she just had this amazing face to shoot close up portraits, it had so much detail from all the wrinkles & damage from the sun over many years.

(102 year old Temple Minder)

This place was also very peaceful and was very nice just walking around taking a photo here and there.  While it was a long way out and back it was well worth it, everybody who I mentioned that I'm going to Cambodia all asked if I was going to Angkor Wat and everyone was shocked when I replied 'no', but at Angkor we would have been competing with thousands of other tourists to walk around and take photos whereas here it was just us and a few locals. It may not have been as grand as the temples at Angkor but it gave us a taste of what they are like and we were able to get shots we'd never get at Angkor.

On our final day we decided to visit a slum on the railway a place Gary has been before and suggested as a place to check out to get a real view of some of the poverty that exists here. When laying eyes on this place it hits you pretty quick how poor this place is, It's an old abandoned train yard with many old carriages just sitting there rotting and being used to dump trash and all sorts in.  Making matters worse this huge state of the art Cambodian government building can be seen right behind within 1km from this train yard. I was a little worried how people will react to us showing up there and taking photos, but everyone seemed really nice and friendly and it turned out to be a very interesting and humbling experience.

(The entrance to the railroad slum)

(The modern government buildings just a few hundred meters behind the slum...)

(Railroad families)

Hearing stories from the locals like the lady who was sewing making shirts and how she gets 2 cents for every shirt she makes and seeing the conditions that they lived in were really eye opening especially for myself who hasn't seen this sort of thing before, yet they all seemed happy and the kids were over the moon when Steve bought them all Ice blocks.

(Our team at Mekong Island (L to R: Steve, Gary (F8), Giles and myself) 

In conclusion I had an amazing time and it was a great experience. I was able to get some great photos which I'm very happy with. Phnom Penh was very much a culture shock for me, a lot of it I have touched on but the things that will really stick with me is how chaotic yet organised it is,  I was blown away by how friendly everyone is and there willingness to have there photo taken especially kids. Also just seeing people living in dire conditions yet seemed to be happy and got on with life. This especially hit me hard and really made me think about the way I live and work on certain ways to improve certain aspects of it.


(Me relaxing at our watering hole on the riverside)

 Lastly I'd like to thank Gary for organising the trip he got us a great hotel and took us to some great places, Steve & Giles it was a pleasure hanging out and shooting with you guys & Sammy and Kanja for taking us around and translating for us.

Final note from F8:

Gary, the Director of F8 has also written a blog post about his experience, that can be seen by clicking here.

Guest blog posts written by Steve who also came along can be seen here:

Thanks for taking the time to visit our blog, if you like our blog and website, please ‘like’ us on our public Facebook page and share this story with your friends with the Facebook and twitter links below.  You can also subscribe to our blog via the RSS link below.

F8 Photography provides commercial photography and training across Asia, with workshops on Street Photography and other photography and video training courses, more details can be found via the ‘courses and workshops’ link and upcoming events via the front page of our website.

Using a Steadicam (VIDEO)

Many of us have been shooting more and more video with our DSLR cameras over recent months and years, which is great, as we get to use the shallow depth lenses for really nice cinematic effects. However, one of the problems we encounter, due to the size and shape of the cameras is excessive movement.  This can be countered by using a monopod or tripod, but sometimes you want moving shots, people walking, running, etc, and this is where the steadicam comes into play.

We have a couple of different steadicam rigs, some of them can get quite expensive, however one we have found particularly useful is the Wondlan Steadicam rig that can be purchased in Hong Kong at a relatively low price compared to other steadicam rigs - but with very similar and sometimes even better results!

We have put together a short video that shows some footage shot with the Wondland Steadicam rig, and compare footage to handheld, as well as showing how we set up the rig very quickly to be able to achieve these results, the video below is 6 minutes long, and Gary did almost fall off a cliff making this film as you will see at 1 minutes 42 seconds!

http://vimeo.com/f8photography/wondlansteadicam

We hope this video is useful for anyone considering getting or using a steadicam, it really does add a lot of production value to any video footage in our opinion, and gives you options that are simply impossible without a steadicam.

When using a steadicam, the way we think about it is we compare it to trying to walk (or run) with a cup full to the brim of hot coffee...its kind of a similar technique to how you would walk, certainly you cannot walk or run naturally, so you will attract a bit of attention whilst using one, maybe even a few laughs, but the footage stability speaks for itself.

Just be careful you look where you are going when using one, its easy to trip or fall over as we demonstrated :-)

Thanks for taking the time to visit our blog, if you like our blog and website, please ‘like’ us on our public Facebook page and share this story with your friends with the Facebook and twitter links below.  You can also subscribe to our blog via the RSS link below.

F8 Photography provides commercial photography and training across Asia, with workshops on Street Photography and other photography and video training courses, more details can be found via the ‘courses and workshops’ link and upcoming events via the front page of our website.


No Photos allowed.....or are they? (VIDEO)

Cat Street market stall advertising 'NO PHOTOS'

In recent news here in Hong Kong there has been much controversy about photographers rights to shoot in public places (in particular in front of large branded designer stores, etc).  Security guards have been misinformed by their employers about what is 'public space' in front of a shop and therefore this has led to confusion, aggressive and sometimes even violent confrontations between photographers and staff.

These big stores are not the only places that try to 'enforce' a ban on photographers, even small market stalls have signs up saying 'no photos', 'no cameras', or 'photo - $200', etc.

To those of us in the know, this is basically outrageous behaviour on behalf of the shopkeeper, trying to create some kind of martial law around their own property, thinking they can control what you do with your camera in a public space.

Now, I don't want to confuse the issue of photographing people, I am well aware as should everyone be that some individuals do not like having their photograph taken, especially without permission, and I  completely understand the issues surrounding that.  This is not what this blog post is about, it is purely about having the right to shoot an interesting market stall, a shop facade or interesting building without having to worry about consequences or thinking that you are doing something wrong - you are not, its well within your rights to take photographs.

This short video we shot in an hour or so the other day shows a quick walkaround Central and Sheung Wan in Hong Kong shooting a few market areas where they have these signs.  I have heard many people say they get confronted in these places so thought I would try to see for myself if we had similar problems and I highlight in the video the ways in which we shoot to try to avoid confrontation.

This is the first DSLR video that Gurung RJ has shot with very little instruction in advance, so I must thank him for his efforts in helping me put this together.

Also a special thanks to Will Gell who has very kindly allowed me to use his music for various projects, amazing musician, check out his albums here:

Please remember when out shooting that you WILL upset some people sometimes, that's unfortunately the nature of the beast with street photography, some people will always react negatively no matter how polite you are, maybe they just had a bad day, or maybe they just grumpy...thats life, its a choice you make if you wish to become a street photographer, never take it personally, and try not to respond in the same manner, keep smiling, say thank you and continue on your way.

Previous recent blog posts that relate to the same issues are linked below, the first one has an extensive video shooting street photography in Kowloon with a GOPRO camera attached to the top of the Leica M9, linked together with the images that we captured during the walkabout:

HOW WE SHOOT STREET PHOTOGRAPHY IN HONG KONG (VIDEO)

DOLCE & GABBANA PROTEST FOR PHOTOGRAPHERS RIGHTS IN HONG KONG

Thanks for taking the time to visit our blog, if you like our blog and website, please ‘like’ us on our public Facebook page and share this story with your friends with the Facebook and twitter links below.  You can also subscribe to our blog via the RSS link below.

F8 Photography provides commercial photography and training across Asia, with workshops on Street Photography and other photography and video training courses, more details can be found via the ‘courses and workshops’ link and upcoming events via the front page of our website.

Don't forget to print your images!

In this digital age, one of the things that us photographers tend to forget to do a lot of the time is to actually print our work. Its far too easy to edit the photos, stick them on a website or on facebook and never pay much attention to them again, this is fine, and is a sign of the times but its a really nice feeling to see our work in print, hanging on the wall

Last year we had an exhibition in Soho from our images we shot in Cambodia and it was the first time in a long time that I had made big prints.  This made me realise how much I appreciated seeing my prints hanging on a wall, they looked so different to on the screen, and since then, I have been more disciplined about printing some of my work and now have my home and office partly plastered with prints.

They don't need to be large like these exhibition prints were and here in Hong Kong you can have frames built at very reasonable prices, typically a 24"x16" print can be framed with non-reflective glass for around HK$400 (USD50) or less if you know where to go.

Quite a few of my friends and clients ask me where I have my prints done, so here is that information:

For our printing we tend to use one main printer in Wanchai, called Sigmax (www.sigmax.com.hk), (their website has map and contact details), they are an excellent printer, with friendly staff - ask for Alice, she is a charming and very helpful young lady who works there.

We usually get our work framed at the frame shop on Johnston Road, directly opposite the Pawn Pub (just aroung the corner from Sigmax), they also have a very good service and price range for any type of frame build.

RJ with Rocco's printsome of our images getting framedframe shop, Johnston Road

Here are some other images so you can see the size of prints that they print with ease at Sigmax, I have seen billboard posters being printed there, so size is no issue for them.

Me with 1 of my Cambodia images

Image courtesy of John Meldrum

So don't just stash all your images away on hard drives never to be seen again...print a few, hang them up and show off your work, be proud!  Something to note is the new version of Adobe Lightroom 4 is coming out shortly, they already have a FREE BETA version you can download here (just remember its not final version yet and only for testing).  One of the great new features within Lightroom is a 'book' module which is linked to Blurb where you can easily create photo books from your images, so I think we will all be seeing more printing of our images in the coming months!

Here is the link to our exhbition video from Soho earlier in 2011 should you wish to take a look at some of the other prints from that trip and see them hanging at the exhibition.

Thanks for taking the time to visit our blog, if you like our blog and website, please ‘like’ us on our public Facebook page and share this story with your friends with the Facebook and twitter links below.  You can also subscribe to our blog via the RSS link below.

F8 Photography provides commercial photography and training across Asia, with workshops on Street Photography and other photography and video training courses, more details can be found via the ‘courses and workshops’ link and upcoming events via the front page of our website.


Street Photography Workshop with Eric Kim - 24th-26th Feb 2012

So its finally happening!  Eric Kim is flying in from LA to host with F8 Photography a 2 day Street Photography Workshop.

There are limited places, so sign up fast if you are interested, we expect this workshop to sell out quickly, as have all Eric's workshops in Asia and over the world.

The workshop will take place from the evening of Friday 24th until the evening of Sunday 26th February 2012.

All the even details and signup information for the event are here or at the following link and from the events shortcut on the front page of our site:

http://www.f8photography.com.hk/event/streetworkshoperickim/

F8 studio lighting workshop - review and feedback

A few weekends ago we held a studio lighting workshop for 2 of our previous clients; Craig and Bernhard, who last year completed the foundation course with F8. They have both been practicing hard and continuing to develop their passion for photography, adding a vast array of images to their portfolios of the last year or so, ranging from travel photography to family lifestyle portraits.

They had both arrived at a point in their photography where they felt it was the right time to broaden their horizons with artificial lighting, so we headed into the studio with 3 beautiful models early one Sunday morning and started playing with light meters, octaboxes and all the other great toys in the studio to see what we could achieve in a few hours of intensive training.

Bearing in mind that neither of the guys had ever set foot in a photography studio as the photographer before, we started with the basics; how to use light meters correctly, 1 light setup, using reflectors, flags and other light modifiers, then moving on to slightly more elaborate lighting setups, using gels, grids, snoots, barndoors, ringflashes and even wind machines amongst other tools.

After 5 hours of loud music, high energy photography and lots of laughter the whole crew was exhausted, even our models mentioned they didn't realise it can be quite tiring and hard work posing for a demanding photographer...haha.

Everyone involved said they had a positive experience and achieved a valuable piece of training to carry them forward with their photography, so I was happy, I had achieved my aim to teach them some new tricks and see everyone leaving the studio with big happy grins on their faces :-)

Using 3 cameras throughout the day, they had taken hundreds of images, I asked them afterwards to send me just a very small selection each, to show that they could also selectively choose and edit images as we would do so in a professional environment, being able to filter work down and produce only the top quality images, a task that is not as easy as it may sound.

I asked them both for a bit of feedback a week or so later and they said the following:

Craig Menzies:  "The studio shoot was a great experience and really focused on the full studio experience, from setting up the backdrops, all the various types of light modifiers, umbrellas and soft boxes, and where each light is placed to create dynamic lighting for the models we were photographing. It was fast paced and we learned a great deal from Gary’s instruction, while shooting amazing photos.  It was also a new experience to deal with models and directing them to create the shots we wanted.  Highly recommended and I will do more studio shoots in the future".

Bernhard Wamelink:  "The one day lighting workshop with Gary Tyson from F8 Photography was a great experience.  In a studio environment all the different aspects of studio lighting were discussed, set up and used in a shoot with models. Gary showed his professionalism in a relaxed way and he was very supportive and a good coach".

We provide a variety of training ranging from foundation training, street photography, DSLR video training and studio lighting.  Details can be found via the links on our home page here. or you can contact us directly from the contact page here.

Here are a selection of images from both Bernhard and Craig's first ever studio shoot:

Here are some additional links to their existing portfolios if you wish to see more of their photography:

Link to Bernhards 500px portfolio

Link to Craig's 500px portfolio